
Bakery-style gluten-free chocolate chip muffins! A deliciously moist, tender crumb, sugary, domed muffin top and loaded with chocolate chips! No one will ever guess they’re gluten free. Pair with a cup of coffee for the perfect treat!

A really good, bakery-style chocolate chip muffin was something I really missed when first going gluten free. After baking many, many batches of muffins, with lots of tweaking and testing along the way, I think I’ve finally landed on the BEST gluten-free chocolate chip muffin recipe!
They have all the key elements of a great muffin: a moist, tender, buttery crumb, a crisp, sugary, domed muffin top, and are full of chocolate chips! These muffins may be gluten free, but I assure you there’s no sacrificing of taste or texture here!
Since gluten-free baked goods tend to have a shorter shelf life than their wheat flour-based counterparts, this recipe makes a small batch of just six muffins. But, if you're baking for a crowd or want to stock up your freezer for later, you can easily double the recipe and whip up a dozen.
Trust me, these gluten-free muffins are so good, you'll want to share them with everyone you know (or keep them all to yourself - no judgment here). So, what are you waiting for? Get baking and indulge in some gluten-free goodness today!
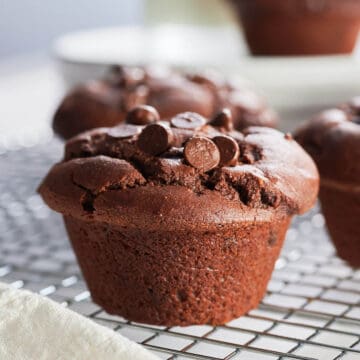
And if you’re both a chocoholic and muffin lover like me, you should also try my gluten-free recipes for gluten-free oatmeal chocolate chip muffins, gluten-free double chocolate muffins and gluten-free banana chocolate chip muffins. All are great, bakery-style gluten-free muffins!
Jump to:
Why You'll Love This Recipe
- Bakery style, domed muffin top – in my humble opinion, the very best part of a muffin is a sky-high, sugary, crispy, domed muffin top, which these chocolate chip muffins have!
- Not too sweet – a chocolate chip muffin shouldn’t just taste like a vanilla cupcake with chocolate chips, minus the icing of course. In addition to a domed muffin top, a good muffin, like these gluten-free chocolate chip muffins, should also be slightly less sweet, and not as soft and spongy as a cupcake.
- Moist and flavourful – gluten-free muffins can sometimes be dry and gritty, but thanks to the inclusion of greek yogurt, these muffins and perfectly moist.
- Easy to make - you don't need fancy equipment or any special techniques, this is a simple recipe that comes together quickly and easily.
- Small-batch recipe – this recipe makes 6 bakery-style muffins. When it comes to gluten-free baking, I like the flexibility smaller batch recipes offer for two reasons: gluten-free baked goods don’t stay fresh as long as traditional wheat flour-based baked goods, and it’s not unusual for only one person in a household to be gluten free. Of course, this recipe can easily be doubled to make 12 muffins!
Ingredients

- butter
- granulated sugar
- egg
- vanilla extract
- gluten-free flour, all-purpose blend
- almond flour
- cornstarch
- baking powder
- salt
- milk
- greek yogurt
- chocolate chips
- demerara/raw sugar (optional)
See the recipe card for quantities.
Ingredient Notes
Butter: I use salted butter, but unsalted butter works too. If using unsalted butter, you’ll want to slightly increase the amount of salt added to the batter to suit your taste. If you’re looking for a gluten-free chocolate chip muffin recipe that doesn’t use butter, try my gluten-free raspberry chocolate chip muffins, which are made with vegetable oil. You can make the recipe as stated, or swap out the raspberries for additional chocolate chips to make them plain chocolate chip muffins.
Gluten-free flour blend: Use a gluten-free all-purpose flour blend that contains xanthan gum. This ensures your muffins aren’t crumbly and can support a tall, domed muffin top. Also make sure your blend doesn’t contain any ingredients with strong flavours, such as bean flour. Refer to baking with gluten-free flour for more information on the different types of gluten-free flour blends, and tips on how to bake with them to get the best results. I use Robin Hood Gluten Free All Purpose Flour Blend or Bob’s Red Mill Gluten Free 1-to-1 Baking Flour.
Almond flour: Adding almond flour helps to keep the muffins moist. It also adds greater richness in flavour. I use Robin Hood Almond Flour or Bob's Red Mill Almond Flour.
Cornstarch: Adding cornstarch helps keep the muffin crumb soft and tender. If using a gluten-free flour blend with a high starch content, such as President’s Choice Gluten-Free All-Purpose Flour Blend, replace the cornstarch with an equal amount of gluten-free flour to prevent your muffins from having too much starch.
Greek yogurt: I use low-fat greek yogurt. Gluten-free baking generally requires more moisture than wheat-based alternatives. The yogurt provides the needed additional moisture, added structure, and depth of flavour.
Chocolate chips: Use semi-sweet chocolate chips. I prefer to use mini chocolate chips in these muffins so that the chocolate is more evenly distributed throughout every bite, but you can also use regular sized chips. Make sure your chocolate chips are gluten free.
Instructions

- Preheat oven to 400°F (200°C). Line a muffin tin with 6 paper liners or grease with vegetable oil. In a large mixing bowl, cream together the melted butter and sugar until smooth. Beat in the egg and vanilla.
- In another bowl, whisk together the gluten-free flour, almond flour, cornstarch, baking powder and salt.
- In a liquid measure, combine the milk and greek yogurt. Add half the flour mixture and half the yogurt mixture to the butter mixture, and stir well. Add the remaining flour mixture and yogurt mixture and stir well, scraping the bottom of the bowl and ensuring all of the flour mixture has been fully incorporated.
- Stir in the chocolate chips.
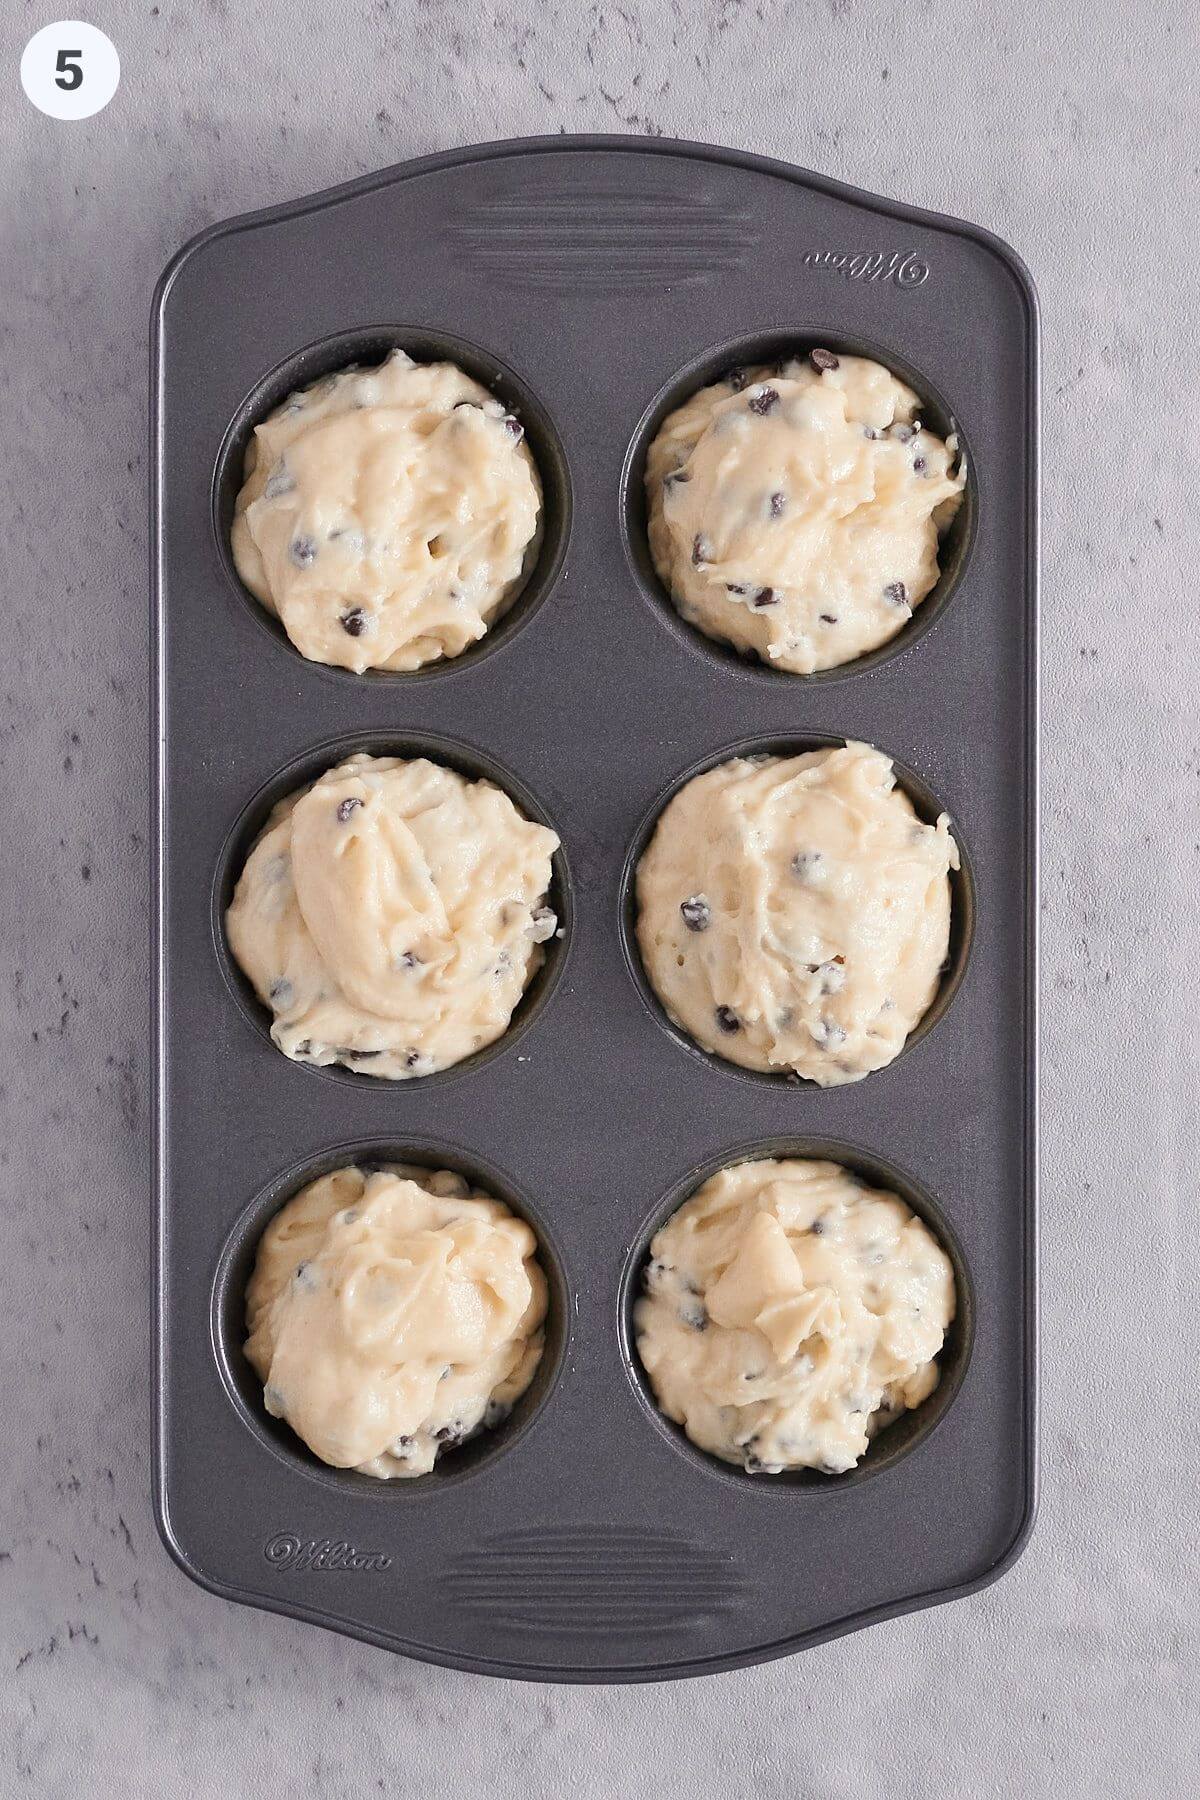
- Divide the batter equally among the 6 muffin cups. Optional: Sprinkle the top of each muffin with demerara/raw sugar and additional chocolate chips.
- Bake for 10 minutes and then reduce the oven temperature to 350°F (180°C) and bake for an additional 8 – 10 minutes, or until an inserted toothpick comes out clean or with a few moist crumbs attached. Let cool slightly in the pan, until the muffins are cool enough to handle, then transfer to a wire rack to cool completely.

Substitutions
To make nut free: If you need your muffins to be nut free, you can replace the almond flour with an equal amount of additional gluten-free flour. Please note, that while still delicious, your muffins will be a little drier.
Top Tips for Perfect Gluten-Free Chocolate Chip Muffins
- Get sky-high, domed muffin tops – There are a few tricks to making sure you get a nice, domed bakery-style muffin top:
- Batter consistency – in general, muffin batter is thicker than cupcake batter. You need a thicker batter in order to form and support a tall, domed muffin top. When you scoop out your muffin batter into your muffin tin, you should notice that it holds its shape.
- Muffin tin – to get bakery-style muffins, you need to fill your muffin cups to the top. Many muffin recipes will say to fill each muffin cup only two-thirds full, but you need to fill them to the top if you want tall, domed muffin tops. Make sure to only do this with thick muffin batters. If you have a muffin recipe that produces a thin batter and fill your muffin cups to the top, you risk having the batter go over the sides of the muffin tin and making a mess of the bottom of your oven.
- Baking temperature – a higher baking temperature is key to getting bakery-style muffin tops. For the first 10 minutes of baking, bake your muffins at 400°F and then reduce to 350°F for the remaining baking time. In traditional wheat flour-based muffin recipes, you may find a suggested baking temperature of 425°F and then reduced to 375°F, but I find with gluten-free muffins, a slightly lower temperature works better.
- Serve warm – I find these muffins are best served warm. To retain a crisp muffin top, reheat in a 300°F (150°C) oven for 10 minutes. You can also heat in the microwave for 20 seconds on high, but the muffin top won’t regain its crispness.

Troubleshooting
Help, my muffins have flat tops!
In addition to my top tips for getting a bakery-style domed muffin top (see above), make sure your baking powder is active. Baking powder generally has a shelf life between six months to one year. You can check to see if it’s still active by spooning ½ teaspoon into a bowl and pouring ¼ cup of boiling water over it. If active, it should bubble up right away.
Also, make sure not to open the oven door while baking. The rush of cold air can cause your muffins to collapse. If you want to check on your muffins while baking, turn on the oven light and look at them through the door.
Help, my muffins are dry!
Two main reasons could cause this: you overbaked your muffins and/or you used too much gluten-free flour.
Remove your muffins from the oven when the tops are slightly golden brown and an inserted toothpick comes out clean or with a few moist crumbs attached.
If you’re measuring your gluten-free flour with measuring cups, use the spoonful method. Spoon the flour into your measuring cup until the flour is mounded over the rim, but don’t pack it down, and then scrape off the excess with the back of a knife. If you dip your measuring cup into the flour and then scrape off the excess, you’ll compact the fine grains and starches found in gluten-free flour blends and overmeasure.
Help, my muffins have soggy bottoms!
Once removed from the oven, don’t let your muffins cool in the muffin tin for more than a few minutes. Transfer them to a cooling rack to cool completely as soon as they are cool enough to handle. This prevents steam from getting trapped in the bottom of the tin and causing any sogginess as they cool.
Storage
Baked muffins: Baked muffins are best the day they are made. Leftovers will keep for 1 – 2 days in an air-tight container at room temperature. Reheat in a 300°F (150°C) oven for 10 minutes. Don’t store them in the fridge, it will dry them out faster. Gluten-free baked goods don’t keep as long as their traditional wheat-based counterparts. Anything you don’t think you’ll finish in 2 days you should freeze.
Freeze: These muffins freeze really well. Cool the freshly baked muffins completely before freezing and store them well wrapped in a freezer bag or container for up to 1 month. I generally freeze them in a single layer in a freezer bag, making sure to squeeze out all of the air. To serve, thaw in a microwave for 20 seconds on high, and then warm in a 300°F (150°C) oven for 10 minutes. You can also thaw and heat using only a microwave, but the muffin top will not regain its crispness.

Frequently Asked Questions
You don’t need to coat your chocolate chips in gluten-free flour, cornstarch or anything else. This muffin batter is thick enough to prevent the chocolate chips from sinking. So really, you don’t need to do anything!
Yes, these muffins freeze really well. Cool the baked muffins completely before freezing and store them well wrapped in a freezer bag or container for up to 1 month. To serve, thaw in a microwave for 20 seconds on high, and then warm in a 300°F (150°C) oven for 10 minutes. Instead of using the oven, you can also thaw and heat using only a microwave, but the muffin top will not regain its crispness.
Yes, you can make the batter up to 24 hours ahead of time, cover it and store it in the fridge. This is great when you want freshly baked muffins in the morning, but don’t have the time to make them and don’t want all the mess – make the batter the night before and just portion and bake in the morning.
Yes! You can use a 12-cup muffin tin and just leave the extra muffin cups empty. You may have heard that you should fill the empty cups with water to prevent the pan from warping and to act as a “heat sink” to ensure even baking. I have not found this to be the case. In my personal experience, whether baking with a muffin pan completely filled with batter, with 6 cups filled with batter and 6 with water, or 6 filled with batter and 6 empty, I have found no difference in the final baked muffins and my tins have never warped.
Yes! To make 12 muffins, simply double all the ingredient quantities in the recipe.
Have you tried this recipe? Please leave a 5-star ⭐️⭐️⭐️⭐️⭐️ rating on the recipe card and consider leaving a comment as well! I would love to hear about how your muffins turned out, and your feedback also helps other readers!
Recipe Card

Gluten-Free Chocolate Chip Muffins
Equipment
- Measuring cups and spoons
Ingredients
- ¼ cup butter, melted
- ⅓ cup granulated sugar
- 1 egg
- 1 teaspoon vanilla
- ¾ cup gluten-free flour, all-purpose blend (see note)
- ⅓ cup almond flour
- 3 tablespoon cornstarch
- 2 teaspoon baking powder
- ¼ teaspoon salt
- ¼ cup milk, see note
- ½ cup greek yogurt
- ½ cup chocolate chips, plus more for topping (optional)
- demerara / raw sugar, for topping (optional)
Instructions
- Preheat oven to 400°F (200°C). Line a muffin tin with 6 paper liners or grease with vegetable oil. In a large mixing bowl, cream together the melted butter and sugar until smooth. Beat in the egg and vanilla.
- In another bowl, whisk together the gluten-free flour, almond flour, cornstarch, baking powder and salt.
- In a liquid measure, combine the milk and greek yogurt. Add half the flour mixture and half the yogurt mixture to the butter mixture, and stir well. Add the remaining flour mixture and yogurt mixture and stir well, scraping the bottom of the bowl and ensuring all of the flour mixture has been fully incorporated.
- Stir in the chocolate chips.
- Divide the batter equally among the 6 muffin cups. Optional: Sprinkle the top of each muffin with demerara/raw sugar and additional chocolate chips.
- Bake for 10 minutes and then reduce the oven temperature to 350°F (180°C) and bake for an additional 8 – 10 minutes, or until an inserted toothpick comes out clean or with a few moist crumbs attached. Let cool slightly in the pan, until the muffins are cool enough to handle, then transfer to a wire rack to cool completely.
Notes
- To make nut free: If you need your muffins to be nut free, you can replace the almond flour with an equal amount of additional gluten-free flour. Please note, that while still delicious, your muffins will be a little drier.
- Get sky-high, domed muffin tops: There are a few tricks to making sure you get a nice, domed bakery-style muffin top:
-
- Batter consistency – in general, muffin batter is thicker than cupcake batter. You need a thicker batter in order to form and support a tall, domed muffin top. When you scoop out your muffin batter into your muffin tin, you should notice that it holds its shape.
- Muffin tin – to get bakery-style muffins, you need to fill your muffin cups to the top. Many muffin recipes will say to fill each muffin cup only two-thirds full, but you need to fill them to the top if you want tall, domed muffin tops. Make sure to only do this with thick muffin batters. If you have a muffin recipe that produces a thin batter and fill your muffin cups to the top, you risk having the batter go over the sides of the muffin tin and making a mess of the bottom of your oven.
- Baking temperature – a higher baking temperature is key to getting bakery-style muffin tops. For the first 10 minutes of baking, bake your muffins at 400°F and then reduce to 350°F for the remaining baking time. In traditional wheat flour-based muffin recipes, you may find a suggested baking temperature of 425°F and then reduced to 375°F, but I find with gluten-free muffins, a slightly lower temperature works better.
- Serve warm – I find these muffins are best served warm. To retain a crisp muffin top, reheat in a 300°F (150°C) oven for 10 minutes. You can also heat in the microwave for 20 seconds on high, but the muffin top won’t regain its crispness.
- Baked muffins: Baked muffins are best the day they are made. Leftovers will keep for 1 – 2 days in an air-tight container at room temperature. Reheat in a 300°F (150°C) oven for 10 minutes. Don’t store them in the fridge, it will dry them out faster. Gluten-free baked goods don’t keep as long as their traditional wheat-based counterparts. Anything you don’t think you’ll finish in 2 days you should freeze.
- Freeze: These muffins freeze really well. Cool the freshly baked muffins completely before freezing and store them well wrapped in a freezer bag or container for up to 1 month. I generally freeze them in a single layer in a freezer bag, making sure to squeeze out all of the air. To serve, thaw in a microwave for 20 seconds on high, and then warm in a 300°F (150°C) oven for 10 minutes. You can also thaw and heat using only a microwave, but the muffin top will not regain its crispness.
Nutrition
Nutritional information shown is an estimate only.
See full disclaimer here.


Rebekah Farrstrom says
Best gluten free muffin recipe I’ve ever made. I made the buttermilk as suggested, but with plain (greek) yogurt, ACV, and coconut milk and WOW. Wrote down the recipe to use in all future recipes that require buttermilk. Thanks!