
Wondering how to bake gluten free? Master gluten-free baking with these tried and true gluten-free baking tips and tricks!

Learning to bake gluten free can be overwhelming and frustrating at times, but it can also be incredibly rewarding. There’s nothing better than when your new bake is just as good, if not better, than the traditional wheat-based version. Something you may have thought wasn't possible when first going gluten free.
Here are my top 10 gluten-free baking tips, to help you on your gluten-free baking journey!
Jump to:
1. Follow recipes designed to be gluten free
Use recipes specifically developed to be gluten free...and stick to them.
There’s a lot of traditional recipes out there, with a note to just replace the flour with the same amount of a gluten-free flour blend, to make it gluten free. The truth is, it’s not that easy! This is often a recipe for something that is pretty inedible. Or best-case scenario, something that many would describe as "good for gluten free". In other words, nothing that could ever pass for traditional wheat-based baked goods.
Gluten-free flours and starches don’t absorb liquid and fat the same way wheat flour does. This means that the ratio of ingredients in gluten free baking needs to be different than wheat flour recipes. In general, gluten-free baking requires a higher ratio of liquids to dry ingredients. Gluten-free baked goods also often benefit from additional leaveners, adjusted amounts of butter and oil, and additional ingredients that can add richness and moisture.
In recipes where developing the gluten in wheat flour is critical to give good shape, structure or chew, such as bread, you need even more adjustments to ingredients and techniques.
This is why it’s really important to use recipes that have been specifically designed to be gluten free. Like all of the recipes here on Bake in Balance! It’s also why it’s really important to stick to the recipe. If you have a lot of experience in traditional baking, it can be tempting to make various tweaks to a recipe. However, the rules of traditional baking versus gluten-free baking are very different. Unless you’re a very experienced gluten-free baker, swapping, omitting or adding ingredients can quickly ruin your bake.
2. Use a blend of gluten-free flours and starches
No single gluten-free flour can replace wheat flour.
Sadly, there’s no one alternative gluten-free flour that can replace wheat flour. To mimic wheat flour, you’ll need a mix of different single-grain flours and starches, as well as a binder.
To get the right ratio of protein to starch, combine a higher-protein flour (or a combination of high-protein flours) such as rice flour, oat flour, corn flour, buckwheat flour, sorghum flour and teff flour, with a gluten-free starch (or combination of gluten-free starches). Common gluten-free starches include corn starch, potato starch, tapioca starch/flour and arrowroot starch/powder. To replace the structure that gluten gives baked goods, you’ll need a binder. Common binders used in gluten-free baking are xanthan gum, guar gum and psyllium husk.
Unfortunately, all of these gluten-free flours and starches are not interchangeable. Each one tastes and behaves differently in various applications. This can make it feel like finding just the right mix for every bake is both a science and an art.
To make things easier, there are gluten-free flour blends that you can purchase, that already combine a mix of gluten-free flours, starches and binders together for you. Some of these blends can be very helpful, especially when you’re first starting out, but not all are created equal. See my post on baking with gluten-free flour to learn about the different types of blends and how to use them.

3. Measure correctly
Learn how to measure gluten-free flours correctly.
To accurately measure gluten-free flours, measure by weight using a scale, or use the spoonful method when using measuring cups.
When using measuring cups, if you use the dip and sweep method, which is common in traditional baking, you’re likely to measure out too much flour. The flours and starches in gluten-free flour blends are finer than wheat flour. This can cause them to compact more when you dip your measuring cup down into them. Instead, try the spoonful method. Spoon the flour into your measuring cup until the flour is mounded over the rim, don’t pack it down, and then scrape off the excess using the back of a knife.
Gluten-free flours often come in small packages. I really recommend getting air-tight storage containers you can transfer your flour into. This makes it easier to scrape the excess flour back into the container. Just make sure the mouth of your container is wider than your largest measuring cup.
4. Add extra ingredients
A few extra ingredients can make all the difference.
Even with the right mix of gluten-free flours and starches, your gluten-free bake will still often benefit from a little added structure, moisture or richness. That’s where a few extra ingredients can come in handy!
So don’t be surprised if you find gluten-free recipe calls for additional ingredients not normally found in the traditional wheat-based recipe. Some common additional ingredients used in gluten-free baking are eggs, almond flour, yogurt and sour cream.
5. Adopt new techniques
Learn new baking techniques, ditch some of the traditional ones.
When you’re new to gluten-free baking, it can sometimes feel like you’ve stepped through the looking glass, where up is down and down is up. A lot of the standard baking rules and visual cues are not applicable to gluten-free baking. That’s because so many of the techniques used in traditional baking recipes are designed to either develop gluten, or to avoid over developing gluten.
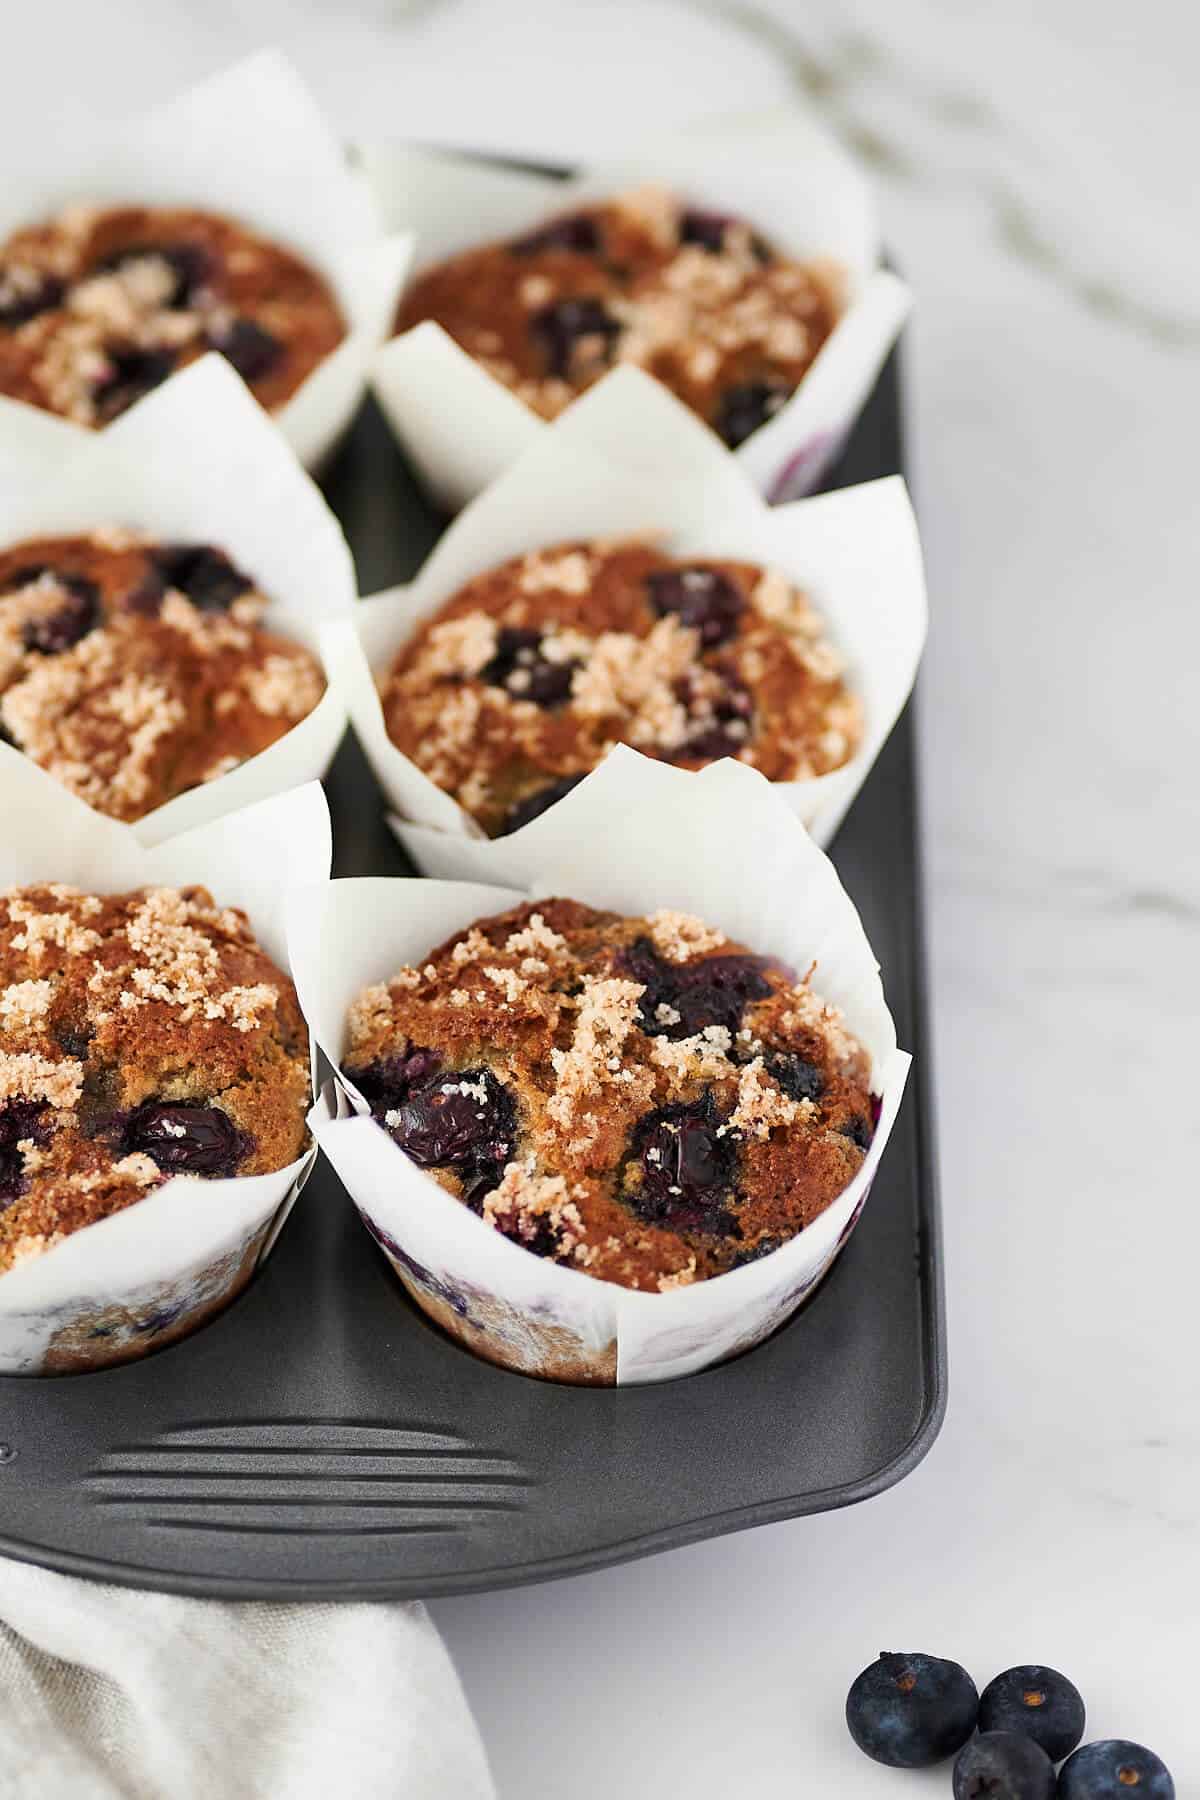
For example, you’ve probably been warned not to over mix muffin batter. To gently mix until combined, and that a few lumps or streaks are even ok. That’s because over mixing will develop more gluten in the batter, creating a tough, chewy muffin; however, when it comes to gluten-free muffins, that’s not that case. There’s no gluten to worry about over developing, and gluten-free muffins will actually benefit from a little extra mixing. The flours and starches in gluten-free muffins are finer and need a little extra mixing to ensure fully combined. The extra mixing also helps add extra structure to your muffin, which gluten-free muffins benefit from.
Gluten-free batters are often thinner/runnier than their wheat-based counterparts, baking times and temperatures can vary, and some gluten-free batter benefits from additional rest time, to give the flours and starches more time to absorb liquid.
When first learning to bake gluten free, follow trusted recipes that were designed to be gluten free. Also be prepared to sometimes go against your traditional baking instincts. As you start to do more gluten-free baking, these new techniques will start to become second nature.
6. Bake for longer
Increase bake times to bake off extra moisture.
Gluten-free baked goods often require longer baking times, due to the added amounts of liquid gluten-free recipes generally call for. This extra liquid needs more time to bake off, otherwise you’ll end up with a gummy / mushy centre.
If you’ve done a lot of traditional baking, you may be used to certain visual cues to indicate doneness. These often don’t work in gluten-free baking. Gluten-free bakes may "look" done, but still require a few additional minutes in the oven.
Due to longer bake times, some gluten-free bakes require tenting with foil to ensure that the centre fully cooks before the top browns too quickly. To avoid over browning, other recipes call for a longer baking time, but at a slightly lower oven temperature.
Use recipes specially developed to be gluten-free and follow the suggested baking times closely.
7. Understand the role flour plays in a recipe
Understand the role flour plays in a recipe before trying to convert it to gluten free. Some recipes are much easier to make gluten free than others, and sometimes we all just need an easy win!
I truly believe that if you use the right ingredients and techniques, you can make a delicious gluten-free alternative to almost any traditional wheat-based baked good. However, some baked goods are much easier to make gluten free than others.
The higher the percentage of flour as compared to other ingredients in the recipe, and the greater the role gluten plays in the structure of the baked good, will greatly impact how difficult it is to make gluten free. In general, the higher the percentage of flour in a recipe, the more you will need to modify the ingredients, ingredient ratios, and techniques to make it gluten free.
For example, brownies have a very low percentage of flour as compared to other ingredients, and therefore are generally fairly easy to make gluten free. On the other end of the spectrum, yeasted breads have a fairly higher percentage of flour as compared to other ingredients, and are generally dependent on kneading the dough to develop gluten to give the bread shape, structure and chew, and therefore, are far more challenging to make gluten free.
From easiest to most difficult, I would typically rank brownies, cakes and cupcakes first. Followed by muffins and quick breads, then cookies, and finally pastry and yeasted breads.
Fruit crisps are also very easy to make gluten free! Try my gluten-free apple crisp or gluten-free peach and raspberry crisp.

8. Avoid hidden gluten
Avoid hidden gluten in ingredients and from cross contamination to ensure what you bake is really gluten free.
Ensure your baked goods are truly gluten free. Make sure that not only all of your ingredients are gluten free, but that you also avoid any cross contamination from gluten containing items while preparing, baking and serving your goods.
Check all ingredients for any gluten-containing ingredients and also look for any "may contain" warnings on labels.
If not baking in a dedicated gluten-free kitchen, make sure all workspaces and equipment are well washed before baking gluten free. Bake gluten-free items first and make sure to wrap and put away before doing any traditional wheat-based baking.
If using the same containers of pantry staples, such as sugar, salt, and baking powder, that you use for your regular baking, make sure that the same measuring cups and spoons haven’t been used to scoop out gluten containing ingredients, such as all-purpose flour, and then used to scoop out other ingredients, potentially contaminating them with gluten.
For more information on reading food labels and cross contamination, please refer to this article by the Canadian Celiac Association.
9. Make the freezer your friend
Take advantage of the freezer to extend the life of gluten-free baked goods and ingredients.
Gluten-free baked goods don’t keep as long as their traditional wheat-based counterparts. Anything you bake that you don’t think you’ll finish in 2 days, you should freeze. Gluten-free cakes, cupcakes, muffins, quick breads and breads generally freeze well. For cookies and pastry dough, I recommend freezing the dough and then baking as needed.
Don’t store gluten-free baked goods in the fridge, as it will dry them out even faster.
It’s also a good idea to store certain gluten-free flours in the freezer. Depending on how quickly you think you’ll use them, freeze flours such as almond, oat, buckwheat, sorghum and brown rice to extend their useful life.

10. Don’t settle
Don't settle for "good for gluten free".
When you first start baking gluten free, it can feel overwhelming at times. Start with simple recipes from trusted sources to teach you the basics of gluten-free baking, and to build your confidence.
Some great recipes for the beginner gluten-free baker:
As you start to take on more challenging bakes, if you’re not getting the results you want, don’t assume it’s just "how it is" when baking gluten free. Experiment with different gluten-free flours and flour blends and recipes from different sources.
Don’t believe the reputation that gluten-free baking can sometimes get. It's not just possible, but very doable, to have cookies, cakes, pies and breads that are truly delicious, while being gluten free, not despite of. Don’t feel like you have to somehow settle because you have to eat gluten free!
I hope all these tips help you on your gluten-free baking journey. Happy baking!


Heather says
Hi Carolyn
What a great new site to have found, I have tried some of the recipes and found they are absolutely delicious. I am working my way through but so far am truly impressed with the recipes and the research you have done. I have to admit I am usually nervous about trying gluten free recipes in general and especially boxed items as they are not always up to my expectations. This is the first site where I have confidence in your recipes even pastry !!!!!
Thanks for enlightening me on tips and tricks as they certainly help me to understand the ins and outs of baking.
Good luck and keep the recipes coming.
A new BIG FAN of Baking In Balance.com
bakeinbalance says
Thank you SOOOO much!! I'm so glad you're enjoying my new site. Happy Baking 😊