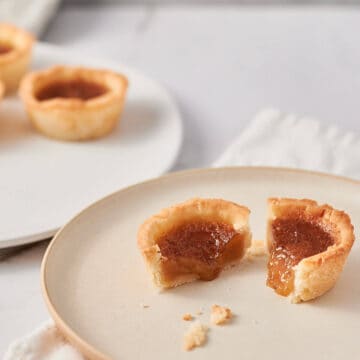
Gluten-Free Butter Tarts
Classic Canadian Butter Tarts made gluten free! Tender and flaky gluten-free pastry, filled with gooey, buttery, caramel goodness! What’s not to love!
Ingredients
- 1 gluten-free pie crust dough, note
- ½ cup brown sugar
- ½ cup corn syrup
- ¼ cup butter, melted
- 2 eggs
- 1 teaspoon vanilla extract
- ¼ teaspoon salt
Instructions
- Preheat oven to 400°F (200°C). Divide the dough into 2 equal portions. Place a piece of wax paper onto a flat surface. Lightly dust with gluten-free flour. Turn the dough out onto the wax paper. Sprinkle the top of the dough with more gluten-free flour and place a second sheet of wax paper on top. Rolling from the centre outwards, between the two pieces of wax paper, roll the dough into a roughly 12” by 8” rectangle.
- Remove the top piece of wax paper and cut out 6 circles 4 inches in diameter. Fit each 4” round into a muffin tin to form a tart shell. Repeat with the remaining half of dough to create 12 tarts in total.
- To make the filling, in a bowl, add the brown sugar, corn syrup, melted butter, eggs, vanilla and salt, and whisk until combined. Pour the filling into the tart shells, filling each tart ⅔ full.
- Bake for 13 – 15 minutes. Transfer to a wire rack to cool. Let cool completely before removing the tarts from the muffin tins.
Notes
Note: I recommend using my gluten-free single pie crust recipe. Make the pie crust dough according to the recipe directions, steps 1 through 6.
Top Tips
- Roll out between wax paper – the dough is a little wetter/sticker than traditional wheat-based pastry. I find it easiest to roll it out between two pieces of wax paper to prevent sticking.
- Work in batches – I also find it easier to potion out the dough rather than roll it out all at once. To cut out 6 tarts at a time, divide the dough into 2 equal portions and roll each portion into a rectangle roughly 8 inches by 12 inches. Alternatively, you can also cut out 3 tarts at a time, by dividing the dough into 4 equal portions and rolling each portion into a rectangle roughly 4 inches by 12 inches.
- Don’t stress – even though the dough is a little sticker and more fragile than traditional pastry, it can also tolerate a little more handling than traditional pastry. If you get any cracks or tears when you transfer it into the muffin tins, just pinch and press back together with your fingers.
- Make ahead – the pie crust dough can be made up to 2 days in advance and refrigerated. You can also roll out the dough and make the tart shells, wrapping well, and refrigerating up to 2 days, until ready to fill and bake. The tarts are best filled and baked the day you plan to serve them.
- Add-ins: if you like raisins in your butter tarts, add them to the tart shells before pouring in the butter tart filling. About a ½ cup of raisins is needed in total for the 12 tarts. To make sure your raisins aren’t dry, it’s also best to soak them in tepid water for 30 minutes before adding. Instead of raisins, you can also try walnuts, pecans or chocolate chips.
- Consistency: if you prefer a really runny centre, use 1 egg instead of 2 in the filling. If you prefer a firmer set filling, bake the tarts 1 - 2 minutes longer.
- Make it dairy free: to make gluten free dairy free butter tarts, replace the butter with your favourite non-dairy butter stick. The pastry is already dairy free.
- The tarts are best served the day made. Keep any leftovers loosely covered at room temperature for up to 2 days.
Nutrition
Serving: 1 tartCalories: 274kcalCarbohydrates: 31gProtein: 4gFat: 17gCholesterol: 51mgSodium: 212mgFiber: 1gSugar: 21g
Nutritional information shown is an estimate only.
See full disclaimer here. Tried this recipe?Mention @bakeinbalance or tag #bakeinbalance!