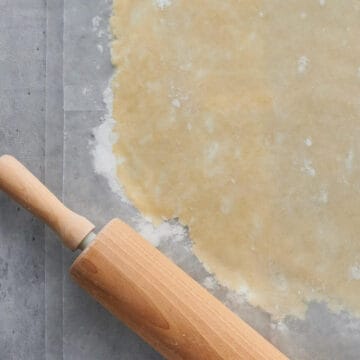
Gluten-Free Pie Crust, Double Crust (Dairy Free)
This homemade gluten-free pie crust is extra flaky and tender. No one will ever guess this recipe is both gluten free and dairy free!
Ingredients
- 2 cups gluten-free flour, all-purpose blend (see note)
- ½ cup almond flour
- 1 teaspoon salt
- 2 tablespoon granulated sugar
- ½ teaspoon baking powder
- ¾ cup vegetable shortening
- 1 tablespoon vegetable or canola oil
- 1 egg
- 1 tablespoon apple cider vinegar
- ⅓ cup cold water
Instructions
- In large bowl, stir the gluten-free flour, almond flour, salt, sugar and baking powder until blended.
- Cut the shortening into the flour mixture using a pastry blender or fork until shortening pieces are the size of peas.
- In a separate bowl, whisk the egg, vinegar, oil and water together.
- Gradually add the liquid mixture to the flour mixture, stirring the mixture together until it comes together forms a ball of dough. Do not over mix, you should still be able to see specks of shortening in the dough.
- Split the dough into 2 equal portions. Flatten each portion of dough into a ½ inch thick disk and wrap in plastic wrap. Chill for 1 hour or up to 2 days. Roll and bake according to pie recipe directions. If baking unfilled, follow the directions per my single crust pie crust recipe.
Notes
Note: use a blend that contains xanthan gum, so the pastry has enough structure and stability. Make sure your blend doesn’t contain any ingredients with strong flavours, such as bean flour. See Baking with Gluten-Free Flour for more information.
Top Tips
- Don’t over mix – to ensure a flaky crust, don’t over mix. Cut the shortening into the flour mixture, just until the shortening pieces are pea size. Don’t work the shortening into the flour so much that it becomes a solid mass. After adding the liquid mixture, just stir until the dough holds together. Again, don’t over mix, should still be able to see small flecks of shortening in your dough.
- Don’t stress about cracks – gluten-free dough is more delicate and not as elastic as compared to a traditional wheat-based version. When removing the wax paper or transferring to the pie plate, it might stick, and cracks might happen, but if they do, don’t stress. This dough is rather pliable, just pinch and seal to patch up any cracks and no one will be the wiser.
- Roll out between wax paper – the dough is a little wetter/sticker than traditional wheat-based pastry. I find it easiest to roll it out between two pieces of wax paper to prevent sticking. It also makes it easier to transfer the dough into the pie plate. Once rolled out, remove the top piece of wax paper and then flip it into the pie plate, remove the second piece of wax paper and then gently press the dough down into the pie plate.
- Unbaked: Keep the dough in the fridge for up to 2 days before using. Ensure tightly wrapped in plastic wrap.
- Freezer friendly: The dough can be frozen and kept up to 2 months. Ensure well wrapped. Thaw in the fridge overnight before using.
Nutrition
Serving: 1 sliceCalories: 275kcalCarbohydrates: 21gProtein: 4gFat: 21gCholesterol: 16mgSodium: 256mgFiber: 3gSugar: 3g
Nutritional information shown is an estimate only.
See full disclaimer here. Tried this recipe?Mention @bakeinbalance or tag #bakeinbalance!